 Leo
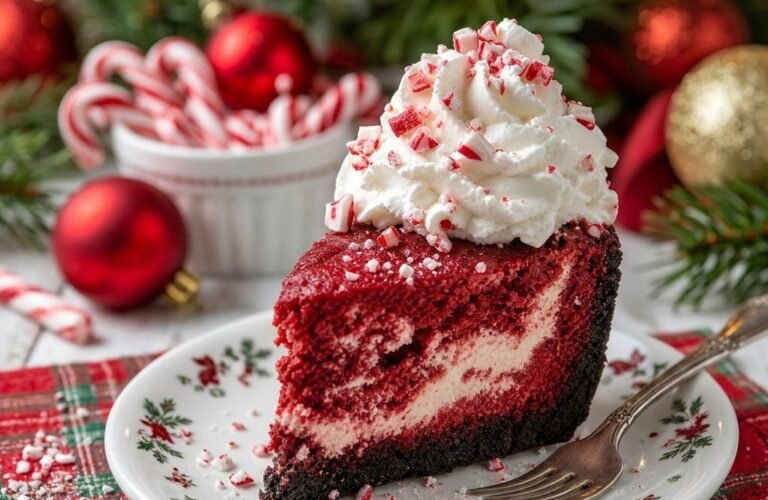
Christmas Red Velvet Cheesecake with Oreo Crust is the aggressive, show-stopping dessert you need when standard sugar cookies simply will not cut it for the holiday table. Standard red velvet cake is notoriously dry. It looks beautiful, but it usually tastes like slightly stale chocolate cake coated in heavy cream cheese frosting. By flipping the script and turning the entire dessert into the cream cheese layer, you get the rich, acidic tang of traditional red velvet locked inside a dense, impossibly creamy texture.
I built this recipe for the heavy holiday dinners where people want something rich but visually commanding. If you’ve been leaning heavily on baked pastries like my Heavenly Cinnamon Roll Apple Lasagna or The Irresistible Appeal of Raspberry Cinnamon Rolls for your holiday brunches, you need a chilled dessert to balance out the menu. If you are terrified of water baths and just want to stick to easy holiday baking, you should pivot to my Easy Gingerbread Bread right now. But if you want to pull a heavy, vibrant red, flawless cheesecake out of the fridge and watch your family stare at it, grab your springform pan.
🍰 Bake Time · Holiday Cheesecake · 12 Servings
Prep time: 30 min · Bake time: 60 min · Chill time: 8 hrs · Calories: 490 kcal
The Nutrition Breakdown
Cheesecake is a brick of pure dairy fat and sugar sitting on top of crushed cookies. Do not lie to yourself about what you are eating. Here is the estimated breakdown per heavy slice (assuming 12 servings):
- Calories: 490
- Protein: 8g
- Carbohydrates: 42g
- Dietary Fiber: 1g
- Total Sugars: 32g
- Fat: 34g
- Saturated Fat: 19g
- Sodium: 310mg
Never, under any circumstances, try to bake this with low-fat or fat-free cream cheese. Fat-free cream cheese is heavily stabilized with weird fillers and excess water. If you bake it, the texture turns into a grainy, rubbery mess that weeps water all over your chocolate crust. Buy the full-fat bricks. It’s Christmas.
The “Room Temperature” Mandate
This is the single reason most home bakers fail at cheesecake. You absolutely cannot take cold bricks of cream cheese straight out of the fridge and start beating them.
If your cream cheese is cold, it will not mix with the sugar. It will instantly break into a million tiny, hard, white lumps. Once those lumps form, they are permanent. You cannot beat them out. You will end up with a lumpy, ugly cheesecake.
You must leave the cream cheese, the sour cream, and the eggs sitting on your kitchen counter for at least two hours before you start this recipe. The cream cheese must be so soft that you can effortlessly push your finger straight through the foil wrapper.
The Ingredient Lineup
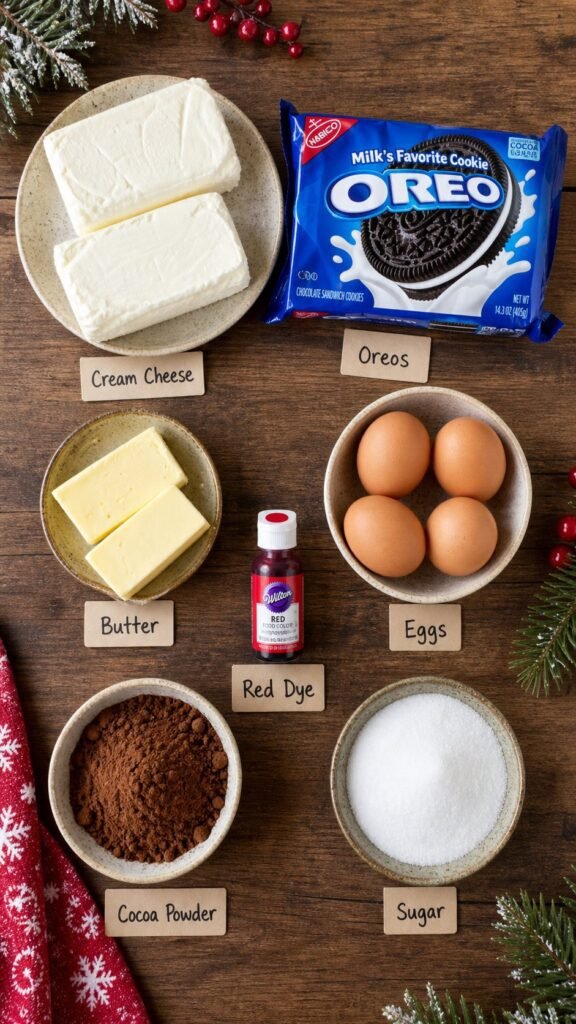
The Oreo Crust:
- 24 whole Oreo cookies (leave the white filling inside)
- 5 tablespoons unsalted butter, melted
The Red Velvet Filling:
- 32 oz (four 8-oz bricks) full-fat cream cheese, aggressively room temperature
- 1 1/4 cups granulated sugar
- 1/4 cup full-fat sour cream, room temperature
- 3 tablespoons unsweetened cocoa powder
- 1 tablespoon pure vanilla extract
- 2 tablespoons liquid red food coloring (do not use natural dyes, they turn brown in the oven)
- 1 tablespoon white vinegar
- 4 large eggs, room temperature
The Liquid Red Dye: You must use artificial liquid red food dye for this. I know natural food colorings are trendy, but beet powder and natural pomegranate dyes physically change color when exposed to the extreme heat of an oven. Your cheesecake will emerge looking like a rusted, muddy brown tire. Use standard red food coloring.
Crush, Beat, Wrap, Bake
1. Annihilate the cookies.
Preheat your oven to 350°F (175°C). Dump the 24 whole Oreos (do not remove the cream) into a food processor and pulse them until they are a fine, black dust. Pour in the 5 tablespoons of melted butter and pulse again until it looks like wet sand.
2. Pack the crust.
Dump the wet cookie sand into a 9-inch metal springform pan.

Use your hands or the flat bottom of a drinking glass to aggressively press the crumbs into a tight, flat layer on the bottom of the pan. Bake the crust alone for exactly 10 minutes to set it, then pull it out and let it cool. Drop the oven temperature to 325°F (160°C).
3. Beat the cheese (carefully).
In the bowl of your stand mixer, beat the soft, room-temperature cream cheese and granulated sugar on medium speed for exactly 3 minutes. Stop the mixer twice to scrape the bottom of the bowl with a rubber spatula. It should be perfectly smooth.
Turn the mixer to low. Add the sour cream, cocoa powder, vanilla extract, white vinegar, and liquid red food dye. Mix until it turns a violently bright red.
4. The Egg Warning.
Leave the mixer on the lowest possible speed. Drop the room-temperature eggs in one at a time. The exact second the yellow yolk disappears into the red batter, stop mixing. If you aggressively whip the eggs on high speed, you will beat pockets of air into the batter. That air will expand in the oven and cause your cheesecake to crack into a canyon.
5. Pour it in.
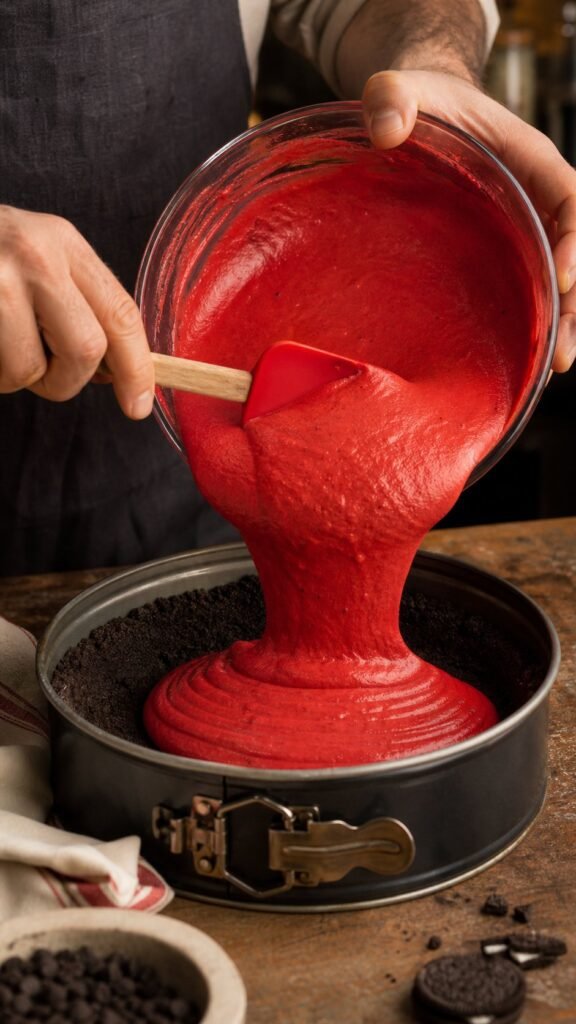
Smoothly pour the thick red batter directly over your cooled Oreo crust. Use a spatula to smooth out the top perfectly flat.
6. The Aluminum Foil Armor.
Cheesecakes require a boiling water bath so the edges don’t scorch before the center cooks. Because springform pans leak, you have to protect the crust.

Take three massive sheets of heavy-duty aluminum foil and tightly wrap the entire outside bottom and sides of your springform pan. Do not use cheap, thin foil, or the water will tear right through it.
7. The Water Bath and Bake.
Place your foil-wrapped pan into a larger roasting pan. Put the roasting pan onto your oven rack. Carefully pour boiling hot water into the roasting pan until it comes about one inch up the side of your foil.
Bake at 325°F (160°C) for exactly 60 minutes. After 60 minutes, turn the oven completely off, crack the oven door open about two inches, and leave the cheesecake sitting inside the cooling oven for another hour. This gentle cooldown prevents cracking.
8. The Chill.
Pull it out of the water, rip off the wet foil, and put the pan in the fridge. It must chill for an absolute minimum of 8 hours before you attempt to take the metal ring off or cut it.

My Ultimate Cheesecake Disasters
My very first water bath was a catastrophic failure because I used cheap, dollar-store aluminum foil. While the cheesecake was baking, a tiny rip formed in the foil. Boiling water flooded the inside of my springform pan. When I cut into the finished dessert, the Oreo crust was a horrifying, soggy, wet black sludge that leaked water onto the serving plate. You absolutely must use wide, heavy-duty foil and wrap it three times.
My second mistake was trying to rush the chilling process. I only left it in the fridge for three hours because I was impatient. I popped the latch on the springform pan, and the entire cheesecake violently slumped outward, cracking down the center and bleeding wet red batter all over the counter. Cheesecake does not fully solidify until it has been refrigerated overnight.
Frequently Asked Questions (FAQ)
Why did my cheesecake crack straight down the middle?
You either beat too much air into the eggs, or you shocked the cake with cold air. If you pull a 300-degree cheesecake out of the oven and slam it onto a cold granite countertop, the rapid temperature change will cause the surface to violently split. You have to let it cool slowly inside the turned-off oven with the door cracked.
How do I cut clean, perfect slices without making a red mess?
Run a long, sharp chef’s knife under screaming hot water from your sink for ten seconds. Wipe the blade completely dry with a paper towel, and make one firm slice straight down and pull it out. Clean the blade, run it under hot water again, wipe it dry, and make the next cut. If you don’t clean the hot knife between every single cut, you will drag red crumbs all over the white icing.
Can I skip the white vinegar?
No. Traditional red velvet cake relies on the acidic reaction between cocoa powder, buttermilk, and vinegar to create its signature flavor. Since we are using dense cream cheese, the tablespoon of sharp white vinegar acts as a necessary flavor amplifier. You won’t taste “salad dressing,” but it keeps the dessert from tasting flat.
The Make-Ahead Holiday Timeline
Cheesecake is the absolute best holiday dessert because it practically demands to be made in advance.
The 48-Hour Plan: Do not try to bake this on Christmas Day. Make the entire cheesecake two days before your party. Let it sit in the fridge, fully covered in plastic wrap. The flavors actually deepen and settle the longer it sits in the cold. Keep it in the fridge until the exact minute you are ready to slice and serve it.
Freezing Strategy: Cheesecakes freeze incredibly well. If you want to bake this weeks in advance, let it chill in the fridge overnight first. Then, remove the springform ring, wrap the entire cake in two tight layers of plastic wrap, followed by a tight layer of aluminum foil. It will survive in the deep freezer for two months. Let it thaw in the refrigerator for 24 hours before you eat it.
Flavor Variations and Toppings
The Peppermint Bark Upgrade: Right before you serve it, whip one cup of heavy cream with two tablespoons of powdered sugar until stiff peaks form. Spread it thickly over the top of the chilled cheesecake, and aggressively smash 10 candy canes with a hammer. Sprinkle the sharp peppermint shards over the whipped cream for an aggressive holiday crunch.
Chocolate Ganache Pour: If you want to lean heavier into the cocoa aspect, make a simple ganache. Heat 1/2 cup of heavy cream and pour it over 1/2 cup of dark chocolate chips. Let it sit for two minutes, whisk until smooth, and let it cool slightly. Pour the thick chocolate syrup directly over the top of the cold red cheesecake and let it drip down the sides.
Christmas Red Velvet Cheesecake with Oreo Crust
Ingredients 01
Kitchen Tools 02
Directions 03
Preheat the oven to 350°F (175°C). Pulse the whole Oreo cookies in a food processor until they form fine crumbs. Add the melted butter and pulse again until the mixture resembles wet sand.
Press the crumb mixture firmly into the bottom of a 9-inch springform pan. Bake for 10 minutes, then remove from the oven and let cool. Reduce the oven temperature to 325°F (160°C).
Beat the softened cream cheese and sugar on medium speed for 3 minutes, scraping the bowl twice. On low speed, mix in the sour cream, cocoa powder, vanilla, red food coloring, and white vinegar until smooth and evenly colored.
With the mixer on its lowest speed, add the eggs one at a time. Mix only until each egg disappears into the batter. Do not overmix or whip excess air into the filling.
Pour the red velvet batter over the cooled Oreo crust and use a rubber spatula to smooth the top.
Wrap the outside bottom and sides of the springform pan tightly with three large sheets of heavy-duty aluminum foil to help prevent water from leaking into the crust.
Place the wrapped pan inside a large roasting pan on the oven rack. Carefully add boiling water to the roasting pan until it reaches approximately 1 inch up the side of the springform pan. Bake at 325°F (160°C) for 60 minutes. Turn the oven off, crack the door open about 2 inches, and leave the cheesecake inside for 1 additional hour.
Remove the cheesecake from the water bath and carefully remove the wet foil. Refrigerate for at least 8 hours before releasing the springform ring and slicing into 12 servings.
Nutrition 04
| Nutrient | Per Slice (1 of 12) |
|---|---|
| Calories | 490 kcal |
| Protein | 8 g |
| Carbohydrates | 42 g |
| Dietary Fiber | 1 g |
| Total Sugars | 32 g |
| Fat | 34 g |
| Saturated Fat | 19 g |
| Sodium | 310 mg |