
 Leo

Every December, a very famous, high-end kitchen store sells beautiful vintage tins of layered peppermint bark. It tastes incredible. It also costs an absolute fortune for a few pieces of candy. I used to buy it every single year as a “treat yourself” moment until I finally looked at the ingredients list on the back of the tin.
It is literally just dark chocolate, white chocolate, and peppermint candy. That is it.
I stopped buying the tins and started making it myself. This Easy Peppermint Bark Recipe requires exactly three ingredients, zero baking, and about twenty minutes of active work. You melt one layer, you melt another layer, you throw candy at it, and you walk away.
I shared a really fast “emergency” appetizer version of this flavor profile recently—my White Chocolate Peppermint Pretzel Crisps—which are great if you are in a rush. But if you want the classic, heavy, gorgeous two-layer slab of real peppermint bark to break into shards for a holiday gift box, this is the recipe you need.
If you are building a massive holiday cookie box, pieces of this bark look incredible tucked in next to my Eggnog Gingerbread Thumbprint Cookies or my Pistachio Dream Cookie Bars. If you want a bite-sized chocolate that doesn’t scream “Christmas,” make my Little Chocolate Chickpea Truffles. But if you are ready to make a gourmet candy that costs a fraction of the fancy tin, grab your chocolate.
🍫 No-Bake · Holiday Candy · 20 Shards
Prep time: 20 min · Chill time: 1 hr · Calories: 140 kcal (per shard)
The Nutrition Breakdown
It is a solid slab of pure chocolate and hard candy. Let’s not overthink this. Here is the estimated breakdown per piece (assuming you break the massive slab into 20 roughly equal-sized shards):
- Calories: 140
- Protein: 1g
- Carbohydrates: 16g
- Dietary Fiber: 1g
- Total Sugars: 14g
- Fat: 8g
- Saturated Fat: 5g
- Sodium: 5mg
This recipe is incredibly clean because there are only three ingredients. You are controlling the quality. Eat a piece and enjoy the holiday season.
The Layer Separation Secret
The absolute worst thing that can happen when making layered bark is “the divorce.” This is when you try to break the hardened bark into shards, and the white chocolate layer completely snaps off and separates from the dark chocolate layer.
This happens because of temperature shock. If you put the bottom dark chocolate layer into the fridge or freezer until it is rock solid, and then pour the hot white chocolate over it, the two layers will never bond. The cold dark chocolate immediately chills the white chocolate before they can fuse together.
The Fix: You must let the dark chocolate layer set at room temperature until it is almost firm, but still slightly tacky to the touch. When you spread the warm white chocolate over this slightly tacky layer, they physically melt into each other just enough to lock together permanently.
The Right Tools for the Job
The Spatula: An offset metal icing spatula is your best friend here. It allows you to spread the chocolate out into a perfectly flat, thin, even layer without dragging your knuckles through the wet candy.
The Double Boiler (or a Glass Bowl): Chocolate burns incredibly fast in the microwave if you aren’t paying attention. The safest way to melt high-quality chocolate is over a double boiler. Just set a glass bowl over a pot of barely simmering water. The gentle steam melts the chocolate perfectly without scorching it.
The Ingredient Lineup
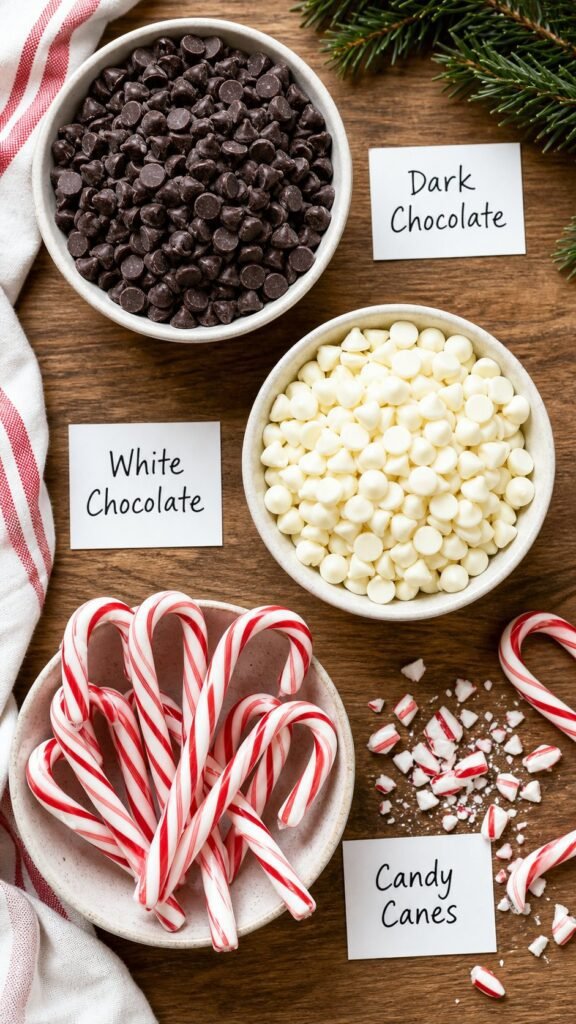
The 3 Ingredients:
- 12 oz (about 2 cups) high-quality semi-sweet or dark chocolate
- 12 oz (about 2 cups) high-quality white chocolate
- 1/2 cup crushed peppermint candies or candy canes (about 5-6 full-size candy canes)
The White Chocolate Rule: I have said this in other posts, but it is critical here. You cannot buy the cheapest bag of white chocolate chips on the shelf. Cheap white chocolate is mostly vegetable oil and wax. It will not melt smoothly; it will seize into a yellow, chalky paste. You must buy high-quality white chocolate chips (like Ghirardelli) that actually list “cocoa butter” in the ingredients, or buy white baking bark/candy melts.
The Peppermint Extract (Optional): Traditional peppermint bark relies on the candy canes to provide the mint flavor. However, if you want it to taste incredibly minty all the way through, you can stir 1/4 teaspoon of pure peppermint extract into the melted dark chocolate before you pour it. Do not add extract to the white chocolate, or it will seize.
Smash, Melt, Spread
1. Aggressively smash the candy.
Unwrap your candy canes and put them inside a heavy-duty Ziploc bag. Squeeze the air out. Take a heavy rolling pin and aggressively bash the candy until it shatters into a mix of small chunks and fine dust. Set it aside.
2. Melt the dark chocolate.
Melt your semi-sweet or dark chocolate in a glass bowl over a pot of simmering water (or in the microwave at 50% power in 30-second bursts, stirring in between). Stir until it is completely glossy and smooth.
3. Spread the bottom layer.
Line a large baking sheet with a sheet of parchment paper or a silicone baking mat. Pour the melted dark chocolate directly into the center of the paper.

Use your offset spatula to spread the chocolate out into a large, even rectangle, about 1/4-inch thick.
4. The Room-Temp Set.
Leave the tray sitting on your kitchen counter. Do not put it in the fridge. Let it sit for about 20 to 30 minutes. You want the dark chocolate to look matte and feel mostly firm, but if you gently touch it with your finger, it should still feel a tiny bit tacky.
5. Melt the white chocolate.
Once the dark layer is ready, melt your white chocolate using the exact same method. Make sure your bowl and spatula are completely clean and dry—a single drop of water will ruin white chocolate.
6. The Top Layer.
Pour the warm white chocolate directly over the tacky dark chocolate layer.

Use your clean offset spatula to very gently spread the white chocolate all the way to the edges, completely covering the dark chocolate. Use a light hand so you don’t aggressively mix the two colors together and create a brown, muddy swirl.
7. The Peppermint Smash.
You must do this immediately. White chocolate sets up very fast. Before the white chocolate dries, heavily sprinkle your crushed candy canes evenly over the entire surface.
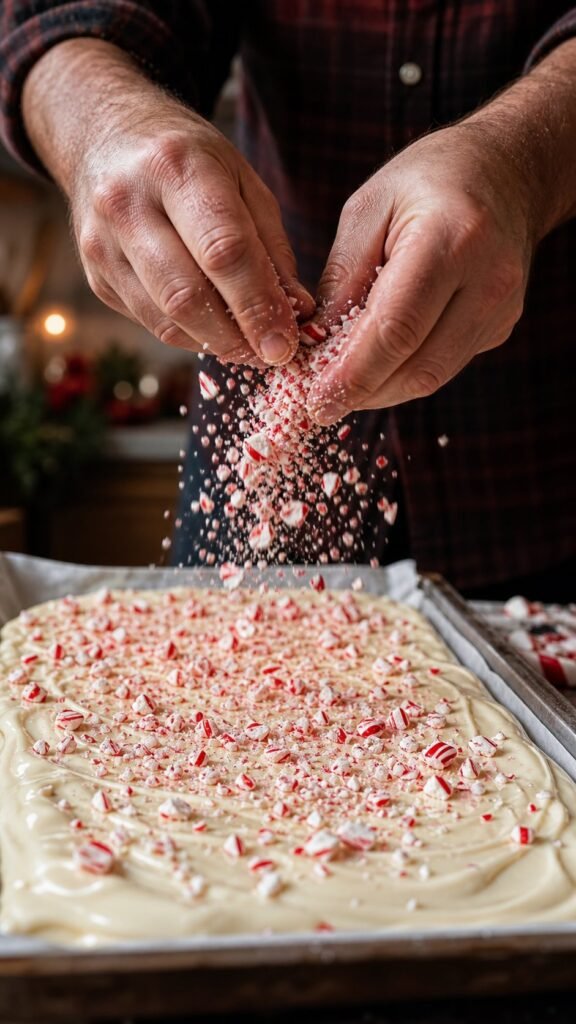
Use the flat palms of your hands to very gently press the candy shards down into the wet chocolate so they stick securely.
8. Chill and Break.
Now that both layers are together, you can safely put the tray in the fridge for 30 to 45 minutes until the entire slab is rock hard. Pull it out and use your hands (or a heavy knife) to snap the bark into jagged, irregular shards.
What I Got Wrong First
My very first batch of peppermint bark suffered “the divorce.” I was impatient. I spread the dark chocolate and threw the tray into the deep freezer for ten minutes so it would harden instantly. It was literally freezing cold when I poured the hot white chocolate over it. They never bonded. When I tried to break it into pieces, the entire top sheet of white chocolate snapped off in one massive piece, leaving a bare sheet of dark chocolate behind. Let the dark chocolate set at room temperature.
My second mistake was using the absolute cheapest white chocolate chips I could find. I put them in the microwave for two minutes on high. When I pulled the bowl out, it looked like a chunk of yellow drywall. The chocolate burned, seized, and turned into a crumbly paste. I had to throw the entire bowl away. Use good chocolate, and heat it gently.
Quick Bark Troubleshooting
Why did my white chocolate seize into a grainy paste?
Water. If steam from your double boiler gets into the bowl, or if your spatula was slightly wet from the dishwasher, the chocolate will seize instantly. Keep everything bone dry.
My candy canes are bleeding red dye into the white chocolate?
This happens when you put the finished bark into the fridge or freezer to store it long-term. When you pull it out into a warm kitchen, condensation forms on the surface. That water melts the red dye on the candy canes, causing them to bleed sticky pink puddles all over the white chocolate. Store your bark at room temperature in a dry place.
Can I make this dairy-free or vegan?
Yes! You can easily swap the semi-sweet chocolate for vegan dark chocolate chips, and swap the white chocolate for oat-milk or rice-milk white chocolate baking chips. The process is exactly the same.
Make-Ahead Candy Prep
This is the ultimate holiday gift because the shelf life is incredibly long.
Up to 3 Weeks Before: Once the bark is completely hardened and broken into shards, stack it in an airtight container or a decorative holiday tin. Keep it in a cool, dry place on your kitchen counter or in a pantry. Do not store it in the fridge, or the candy canes will melt. It will stay perfectly fresh and snappy for up to three weeks.
Variations and Tweaks
The Triple Chocolate Swirl: Instead of keeping the layers completely separate, pour the white chocolate over the dark chocolate while the dark chocolate is still completely wet. Drag a butter knife aggressively through both layers to create a massive, marbled swirl of black and white, then cover it in peppermints.
Toasted Almond Bark: Skip the peppermints. Stir half a cup of chopped, toasted almonds into the dark chocolate, and top the white chocolate layer with another handful of almonds and flaky sea salt.
Cookies and Cream Bark: Instead of candy canes, crush up a massive handful of classic chocolate sandwich cookies (Oreos). Press the cookie chunks into the wet white chocolate. It tastes exactly like the filling inside my No-Bake Grinch Oreo Truffles.
Easy Peppermint Bark
Dark chocolate + white chocolate + candy canes — the fancy tin for a fraction of the price. Two glossy layers that actually stay together, shattered into snowy peppermint shards.
Ingredients 01
Cheap white chips are mostly oil and wax — they seize into yellow chalk paste instead of melting glossy. Buy chips that list cocoa butter in ingredients (Ghirardelli is perfect) or white baking bark. Heat gently, keep bowl bone dry — one drop of water ruins white chocolate.
As an Amazon Associate, we may earn from qualifying purchases. Click any ingredient name to shop it on Amazon — no extra cost to you.
How to Cook 02
Unwrap canes into heavy-duty Ziploc, squeeze air out, bash aggressively with rolling pin till mix of fine dust and small shards. Set aside — you need it ready the second white chocolate is spread.
Set glass bowl over pot of barely simmering water (double boiler) and stir till glossy and smooth. Or microwave at 50% power, 30-sec bursts, stirring between. If using extract, stir ¼ tsp peppermint into dark now — never into white.
Line large baking sheet with parchment or silicone mat. Pour dark into center, use offset spatula to spread to large even rectangle, about ¼-inch thick. This is your base — keep it flat.
Leave tray on counter — do NOT fridge. Let sit 20–30 min till dark looks matte and feels mostly firm but still slightly tacky to light touch. Tacky = layers fuse. Rock-hard cold = “the divorce.”
Same gentle method, with perfectly clean, completely dry bowl and spatula. White chocolate is unforgiving — steam or a wet spatula seizes it grainy instantly.
Pour warm white directly over tacky dark. With clean offset spatula, gently spread edge to edge covering dark completely. Light hand — don’t aggressively swirl or you’ll muddy to brown.
White sets fast — immediately sprinkle crushed candy evenly over entire surface. Gently press with flat palms so shards anchor into wet chocolate and don’t fall off later.
Now you fridge it: 30–45 min till slab is rock-hard. Pull and snap with hands (or heavy knife) into jagged irregular shards — that’s the vintage-tin look.
Notes 03
Impatience caused it: I froze dark 10 min till ice-cold, poured hot white over — layers never bonded. White sheet snapped off in one piece. Fix: room-temp set till tacky so warm white melts just enough into dark to lock permanently. Freezer = divorce.
Cheapest chips + 2 min on high microwave = yellow chalky paste — entire bowl trashed. Use cocoa-butter white chocolate and heat gently (steam or 50% bursts). That yellow drywall is scorched, seized chocolate.
Grainy paste? Water. Steam in bowl or wet spatula seizes instantly — keep everything bone dry. Red bleeding pink puddles? Fridge condensation. Storing finished bark in fridge then moving to warm kitchen sweats the candy — dye melts. Store at room temp dry.
Offset spatula = flat thin rectangle without knuckles in chocolate. Double boiler (glass bowl + barely simmering water) = gentle steam that won’t scorch. Microwave works if you do 50% + 30-sec stirs.
Harden, break, stack in airtight tin at cool dry room temp (pantry/counter) — not fridge or canes melt/bleed. Stays snappy fresh up to 3 weeks — ultimate gift-ahead candy.
Triple Swirl: pour white while dark still wet, drag butter knife through both for marbled black/white, then candy. Toasted Almond: stir ½ cup toasted chopped almonds into dark, top white with almonds + flaky sea salt (no peppermint). Cookies & Cream: crush Oreos into white — tastes like Grinch Oreo Truffles filling.
Nutrition 04
| Nutrient | Per Shard (1 of 20) |
|---|---|
| Calories | 140 kcal |
| Protein | 1 g |
| Carbohydrates | 16 g |
| Dietary Fiber | 1 g |
| Total Sugars | 14 g |
| Fats | 8 g |
| Saturated Fat | 5 g |
| Sodium | 5 mg |
Estimated for 20 equal shards from 24 oz chocolate + ½ cup candy. Pure chocolate + hard candy — clean 3-ingredient candy, you control quality.
Allergens: dairy (milk in white + dark), soy (chocolate). Use vegan dark + oat/rice-milk white baking chips for dairy-free — same method. Candy canes may contain egg.
Build the cookie box: White Chocolate Peppermint Pretzel Crisps · Eggnog Gingerbread Thumbprint Cookies · Pistachio Dream Cookie Bars · Little Chocolate Chickpea Truffles