
 Leo
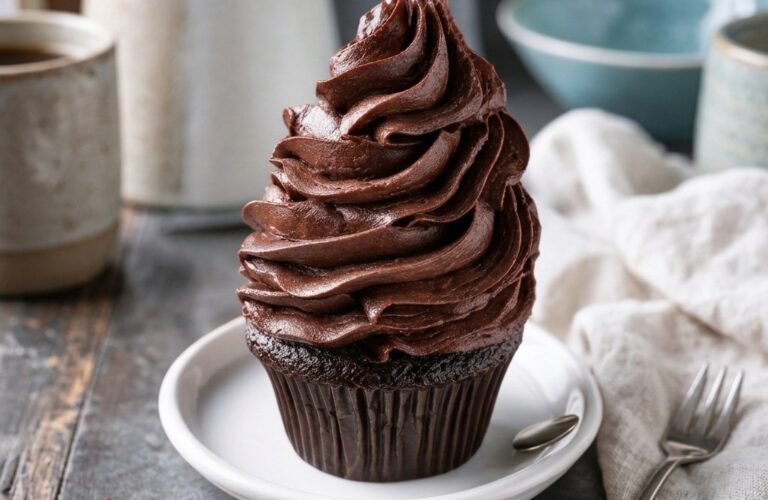
The Best Chocolate Buttercream Frosting (6-Minute Recipe) You’ll Ever Make is the aggressive, foolproof staple that every single home baker needs memorized. Store-bought frosting in a plastic tub is a horrifying blend of vegetable oil, corn syrup, and artificial wax. It tastes like chemicals and leaves a greasy film on the roof of your mouth. When you make real buttercream from scratch, you are literally just whipping butter, cocoa, and sugar into a cloud. It takes exactly six minutes, and it will fundamentally change the way you bake.
I rely on this specific ratio whenever I need to salvage a cake or turn an average dessert into a masterpiece. If you have been spending your weekends baking massive projects like the Gooey Brownie Pie or the towering Blueberry Muffin Recipe (The Best), you don’t have the patience to stand over a stove boiling a Swiss meringue buttercream. If you need something insanely fast to pair with the Pumpkin Pie Crescent Rolls with Cream Cheese Filling, this is it. It requires zero cooking, zero candy thermometers, and zero stress. Grab a mixer and some butter.
🍫 No-Bake · Baking Basics · Frosts 12 Cupcakes (or one 9×13 cake)
Prep time: 6 min · Calories: 180 kcal (per 2 tablespoons)
The Best Chocolate Buttercream Frosting
The Nutrition Breakdown
Buttercream frosting is literally named after its primary ingredient: butter. You are whipping pure dairy fat with refined sugar. Do not trick yourself into thinking this is diet-friendly. Here is the estimated breakdown per standard serving (about 2 generous tablespoons):
- Calories: 180
- Protein: 0g
- Carbohydrates: 22g
- Dietary Fiber: 1g
- Total Sugars: 20g
- Fat: 11g
- Saturated Fat: 7g
- Sodium: 10mg
Do not attempt to make this “healthy” by using margarine or a sugar substitute. Margarine contains too much water and will separate into a broken, greasy soup when whipped. Powdered sugar substitutes do not have the structural starch necessary to build a stiff, pipeable frosting. Accept the butter.
The “Sift Or Die” Mandate
This is the single most critical rule of making smooth buttercream.
Powdered sugar and cocoa powder are notorious for holding tiny, rock-hard clumps. If you dump them straight from the bag into your whipped butter, those clumps will become permanently encased in fat. No amount of aggressive mixing will break them down. When you pipe the frosting onto a cake, it will be speckled with dry, bitter white and brown dots, and it will feel like you are chewing on sand.
You must sift your dry ingredients. You have to place a fine metal mesh strainer over your bowl and forcefully push the cocoa powder and powdered sugar through it. This aerates the powders and crushes the lumps, guaranteeing a perfectly smooth, velvety frosting.
The Ingredient Lineup
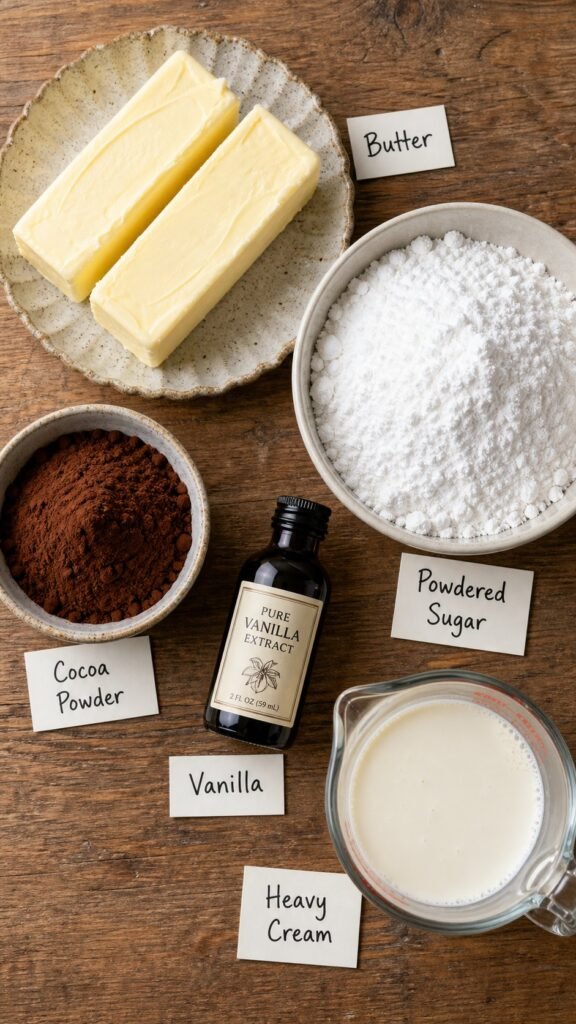
The Fat:
- 1 cup (2 sticks) unsalted butter, softened to exact room temperature
The Sweet & Bitter Base:
- 3 cups powdered sugar (confectioner’s sugar), sifted
- 3/4 cup unsweetened cocoa powder (Dutch-process preferred), sifted
- A tiny pinch of fine sea salt
The Liquids:
- 2 teaspoons pure vanilla extract
- 3 to 4 tablespoons heavy whipping cream, room temperature
The Butter Temperature Warning: The butter must be room temperature. If the butter is cold, your mixer will just chop it into tiny yellow pebbles. If the butter is melted, it will dissolve the sugar and turn into a runny, liquid glaze that will immediately slide off your cake. The butter is perfectly softened when you can press your finger into it and it leaves a dent, but it still holds its shape without looking greasy.
Beat, Sift, Whip, Frost
1. Annihilate the butter.
Place your room-temperature butter into a large glass mixing bowl or the bowl of your stand mixer.

Use an electric mixer on medium-high speed to aggressively beat the butter entirely by itself for exactly 3 minutes. Stop halfway to scrape the bowl. The butter should transition from a dark yellow block to a pale, fluffy, nearly white cream.
2. The Sift.
Turn the mixer off. Place your wire mesh strainer directly over the bowl of whipped butter.
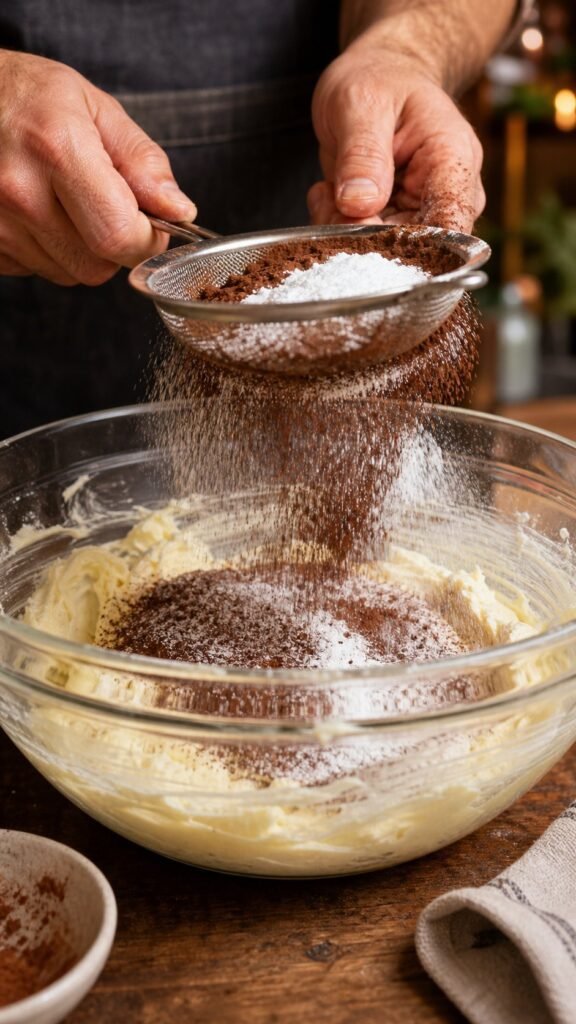
Dump the 3 cups of powdered sugar and the 3/4 cup of cocoa powder into the strainer. Use a spoon to force the powders through the mesh until every single hard clump is destroyed. Add the tiny pinch of salt.
3. The Mess-Free Mix.
Do not turn your mixer on high speed right now, or you will detonate a mushroom cloud of cocoa powder all over your kitchen walls.
Take a spatula and manually stir the sifted powders into the butter just a few times to weigh the dust down. Once it looks slightly hydrated, turn your mixer onto the absolute lowest speed and mix until it forms a thick, stiff paste.
4. The Liquid Transformation.
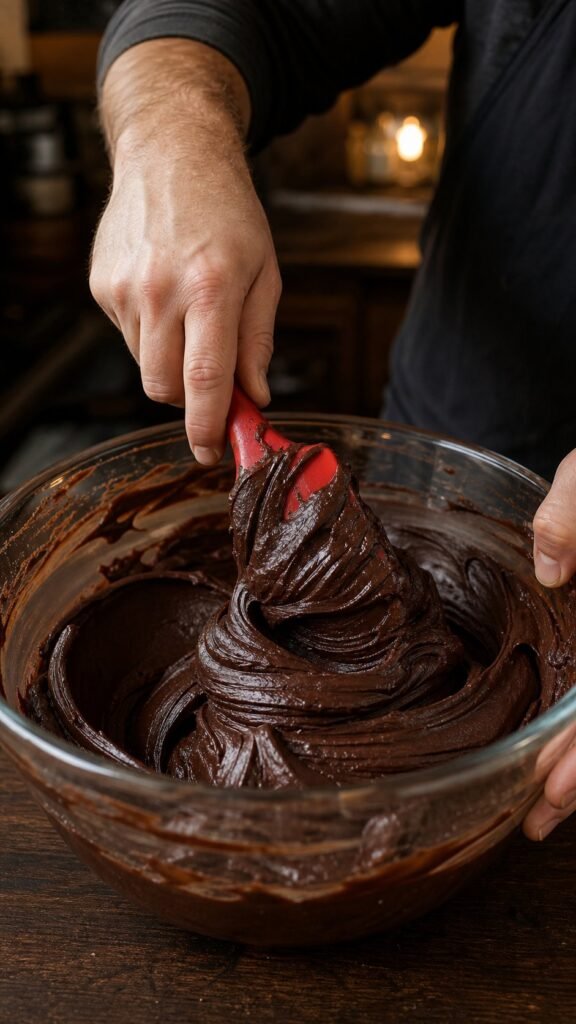
With the mixer still running on low, pour in the vanilla extract and 3 tablespoons of the heavy whipping cream. The exact second the liquids are absorbed, turn the mixer speed up to high.
5. The Final Whip.
Whip the frosting on high speed for exactly 2 minutes. The heavy cream will aerate, turning the stiff paste into a massive, glossy, cloud-like frosting that holds stiff peaks. If it feels too thick, add the 4th tablespoon of heavy cream and whip for another 10 seconds.
Use it immediately, or cover the bowl tightly with plastic wrap to prevent a crust from forming.
My Ultimate Frosting Disasters
The first time I made this, I was impatient and decided to microwave my butter to soften it. I left it in for 10 seconds too long, and the center melted into liquid oil. I tried to whip the powdered sugar into it anyway. I ended up with a runny, greasy, dark brown soup that refused to hold a peak. I put it in the fridge to harden it, but it just set into a block of fudge. You absolutely must let the butter soften naturally on the kitchen counter for an hour.
My second mistake was using skim milk instead of heavy cream. Skim milk is basically water. When I poured it into the butter, the frosting immediately lost its structure and became thin and weeping. Heavy cream provides the necessary fat and volume to aerate the frosting into a fluffy cloud.
Frequently Asked Questions (FAQ)
Can I make this frosting ahead of time?
Yes. You can make this buttercream up to 5 days in advance. Put it in an airtight Tupperware container and store it in the refrigerator. Because it is essentially pure butter, it will harden into a solid brick in the fridge. Before you use it, you must leave it on the counter for two hours to reach room temperature, then throw it back into your mixer and whip it on high speed for two minutes to restore its fluffy texture.
Why is my frosting grainy and crunchy?
You skipped the sift, or you used cheap powdered sugar. If you dumped the powders straight from the bag, you trapped hard clumps of sugar inside the fat. Alternatively, if your kitchen is freezing cold, the butter may have seized up, preventing the sugar from dissolving properly into the fat.
Can I use regular cocoa powder instead of Dutch-process?
Yes, but the flavor will be different. Standard cocoa powder (like Hershey’s) is more acidic and has a lighter, reddish-brown color. Dutch-process cocoa has been washed in an alkaline solution, which neutralizes the acid and makes the chocolate flavor significantly darker, richer, and smoother. If you want a deep, bakery-style frosting, buy the Dutch-process.
Flavor Variations and Upgrades
The Mocha Kick: Chocolate and coffee are best friends. Before you add the vanilla extract, dissolve 1 tablespoon of instant espresso powder directly into the vanilla. The espresso completely amplifies the bitter notes of the cocoa powder, making the frosting taste incredibly rich and complex without actually tasting like a cup of coffee.
The Dark Chocolate Orange: The combination of dark chocolate and citrus is elite. Before you add the heavy cream, take a fresh orange and use a microplane to aggressively zest the entire peel directly into the frosting. The citrus oils instantly cut through the heavy dairy fat, giving the frosting an expensive, high-end bakery flavor.
The Spicy Mexican Chocolate: If you are putting this frosting on a dense brownie or dark chocolate cake, add some heat. Sift 1 teaspoon of ground cinnamon and exactly 1/4 teaspoon of cayenne pepper into the bowl along with the cocoa powder. The subtle chili heat hits the back of your throat right after the heavy sweetness of the sugar, creating an addictive contrast.
🍫 No-Bake · Baking Basics
The Best Chocolate Buttercream Frosting
Ingredients
The Fat
- 1 cup (2 sticks) unsalted butter, softened to exact room temperature
The Sweet & Bitter Base
- 3 cups powdered sugar (confectioner’s sugar), sifted
- 3/4 cup unsweetened cocoa powder (Dutch-process preferred), sifted
- A tiny pinch of fine sea salt
The Liquids
- 2 teaspoons pure vanilla extract
- 3 to 4 tablespoons heavy whipping cream, room temperature
The Butter Temperature Warning: The butter must be room temperature. Cold butter gets chopped into tiny yellow pebbles; melted butter dissolves the sugar into a runny, liquid glaze that slides right off your cake. It is perfectly softened when your finger presses in and leaves a dent, but it still holds its shape without looking greasy.
Kitchen Tools
- Electric hand mixer or stand mixer
- Large glass mixing bowl
- Fine mesh strainer
- Rubber spatula
- Measuring cups and spoons
- Plastic wrap
As an Amazon Associate, Cook With Us Daily earns from qualifying purchases.
Directions
- Annihilate the butter. Place the room-temperature butter — softened naturally on the counter about an hour, never microwaved — into a large glass mixing bowl or the bowl of your stand mixer. With an electric mixer on medium-high speed, aggressively beat the butter entirely by itself for exactly 3 minutes, stopping halfway to scrape the bowl. It should transition from a dark yellow block to a pale, fluffy, nearly white cream.
- The sift. Turn the mixer off. Place a wire mesh strainer directly over the bowl of whipped butter, dump in the 3 cups of powdered sugar and 3/4 cup of cocoa powder, and use a spoon to force the powders through the mesh until every single hard clump is destroyed. Add the tiny pinch of salt.
- The mess-free mix. Do not turn your mixer on high right now, or you will detonate a mushroom cloud of cocoa powder all over your kitchen. Take a spatula and manually stir the sifted powders into the butter a few times to weigh the dust down. Once it looks slightly hydrated, mix on the absolute lowest speed until it forms a thick, stiff paste.
- The liquid transformation. With the mixer still running on low, pour in the vanilla extract and 3 tablespoons of the room-temperature heavy whipping cream (heavy cream only — skim milk is basically water and the frosting will go thin and weepy). The exact second the liquids are absorbed, turn the mixer speed up to high.
- The final whip. Whip on high speed for exactly 2 minutes — the heavy cream aerates the paste into a massive, glossy, cloud-like frosting that holds stiff peaks. If it feels too thick, add the 4th tablespoon of heavy cream and whip for another 10 seconds. Use it immediately, or cover the bowl tightly with plastic wrap to prevent a crust from forming.
Nutrition
Estimated values per standard serving (about 2 generous tablespoons):
| Nutrient | Per Serving |
|---|---|
| Calories | 180 kcal |
| Protein | 0 g |
| Carbohydrates | 22 g |
| Dietary Fiber | 1 g |
| Total Sugars | 20 g |
| Fat | 11 g |
| Saturated Fat | 7 g |
| Sodium | 10 mg |