
 Leo

Cute candy sushi | How to make candy sushi easy is the ultimate weekend project when you want to look like a culinary artist but actually just want to play with melted marshmallows and gummies. When you are burnt out from baking incredibly serious, heavy holiday desserts, you need a break. If you have spent the last week carefully monitoring a water bath for a Peppermint Bark Cheesecake, heavily mashing ugly brown fruit for a Creamy Banana Pudding Cheesecake with Vanilla Wafer Crust, or frantically stuffing Cranberry Cream Cheese Crescent Bites before company arrives, it is time to turn your brain completely off.
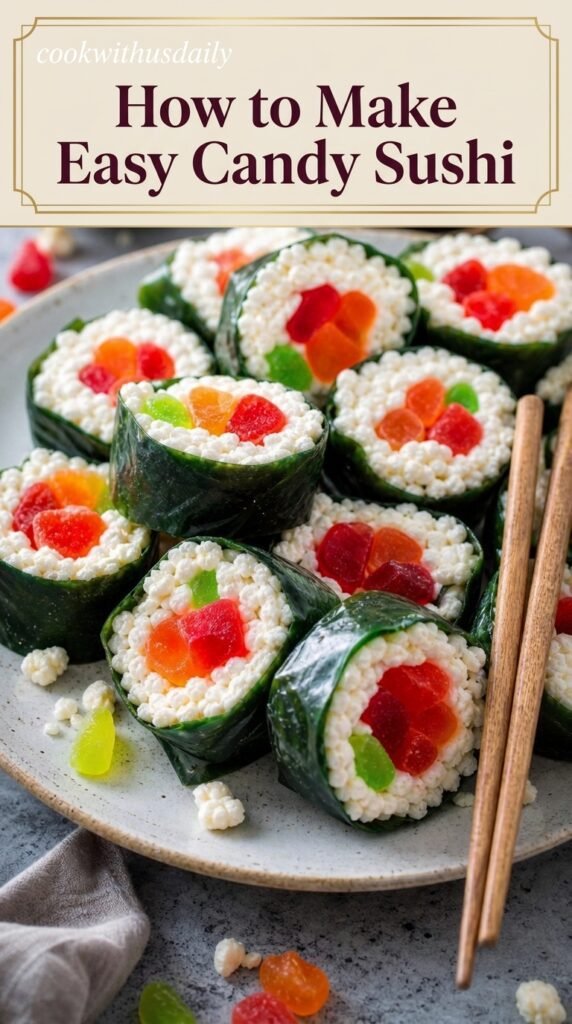
Cute Candy Sushi
This recipe requires zero baking, zero precision, and zero stress. You are literally just making Rice Krispies Treats, violently flattening them, and rolling them around neon gummy worms. Wrapping the outside in a green Fruit Roll-Up mimics the look of seaweed (nori) perfectly, creating a dessert that looks identical to a high-end maki roll but tastes like pure childhood nostalgia. If you love fast stovetop desserts like my No-Bake Coconut Pecan Praline Cookies, you will dominate this recipe in ten minutes flat. Grab a bag of marshmallows.
🍣 No-Bake Dessert · Fun Snacks · 24 Sushi Pieces
Prep time: 15 min · Set time: 20 min · Calories: 110 kcal
The Nutrition Breakdown
We are taking pure refined sugar, melting it down, mixing it with toasted rice carbohydrates, and stuffing it with more pure refined sugar. Please do not try to justify this nutritionally. Here is the estimated breakdown per individual piece of candy sushi:
- Calories: 110
- Protein: 0g
- Carbohydrates: 22g
- Dietary Fiber: 0g
- Total Sugars: 14g
- Fat: 2g
- Saturated Fat: 1g
- Sodium: 55mg
Do not try to make these “healthy” by using brown rice cereal or sugar-free gummy bears. Sugar-free gummies are infamous for destroying your digestive system, and the heavy bran in brown rice cereal will not absorb the marshmallow properly, leaving your sushi rolls falling apart on the plate. Embrace the sugar crash.
The “Butter-Greased Hands” Mandate
This is the single most important rule when working with melted marshmallow.
If you try to press hot, melted marshmallow cereal into a flat sheet with your bare, dry hands, you will instantly regret it. The marshmallow acts like culinary napalm. It will fuse to your skin permanently. You will end up wearing a sticky, hard glove of Rice Krispies that you literally have to scrub off with hot water and a steel sponge.
Before you ever touch the warm cereal mixture, you must aggressively rub a heavy coat of softened butter all over both of your hands. The fat creates a non-stick barrier, allowing you to easily press and mold the sticky cereal without a single grain of rice sticking to your fingers. Keep the butter wrapper on the counter and re-grease your hands as needed.
The Ingredient Lineup
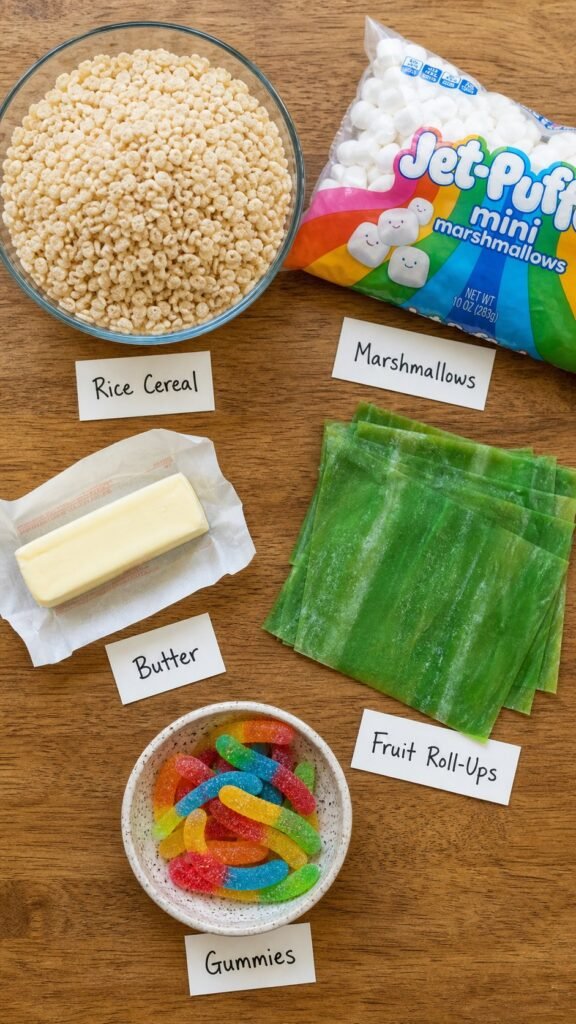
The Sushi “Rice”:
- 4 cups Crispy Rice Cereal (classic Rice Krispies)
- 4 cups Mini Marshmallows (use fresh ones, not the stale bag from last year)
- 3 tablespoons unsalted butter
The “Nori” Seaweed Wrapper:
- 1 box of Green Fruit Roll-Ups or Fruit by the Foot (If you can’t find green, dark purple or blue works too)
The Sushi Filling & Toppings:
- 1 bag of Gummy Worms (the bright neon ones look the best inside the roll)
- 1 bag of Swedish Fish (for the Nigiri style)
- Black licorice strings (optional, to tie the Nigiri)
The Marshmallow Warning: You must use a fresh bag of mini marshmallows. If you use a bag that has been sitting open in your pantry for six months, the marshmallows will have dried out. Stale marshmallows do not melt smoothly; they turn into a massive, tough, unchewable rubber ball when heated. Spend the two dollars on a new bag.
Melt, Press, Roll, Slice
1. Melt the glue.
In a massive, microwave-safe glass bowl, combine the 3 tablespoons of butter and the 4 cups of mini marshmallows. Microwave on high for exactly 60 seconds. The marshmallows will puff up massively. Pull the bowl out and immediately stir with a red silicone spatula until the butter and marshmallows melt into a completely smooth, liquid white cream.
2. Fold the rice.
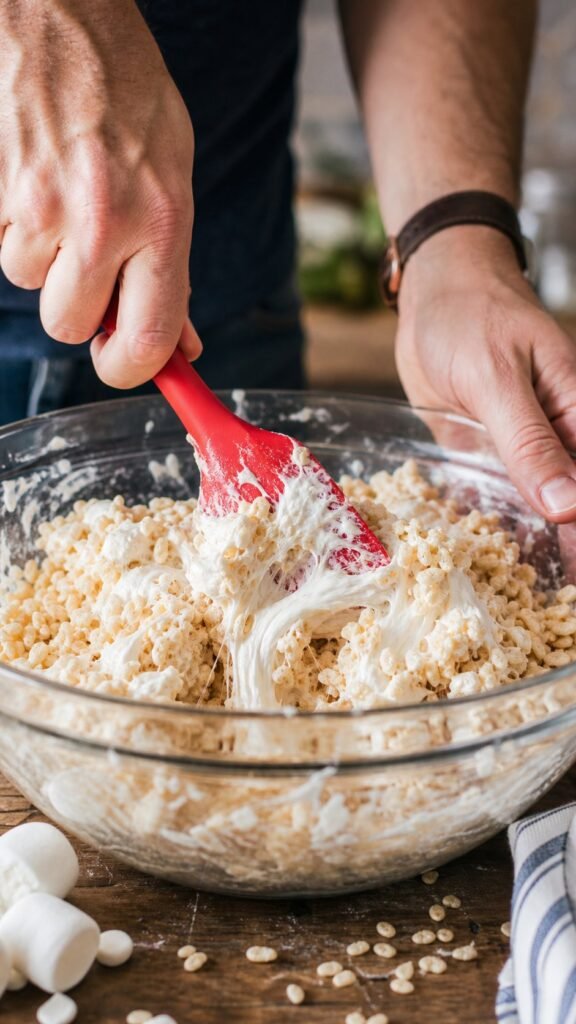
Instantly dump the 4 cups of crispy rice cereal directly into the hot marshmallow soup. Use your spatula to aggressively fold the mixture together. You have to move quickly. As the marshmallow cools, it becomes significantly harder to stir. Ensure every single piece of cereal is coated in white sticky glue.
3. The Greased Press.
Lay a massive sheet of wax paper or parchment paper flat on your kitchen counter. Coat your hands heavily in butter.
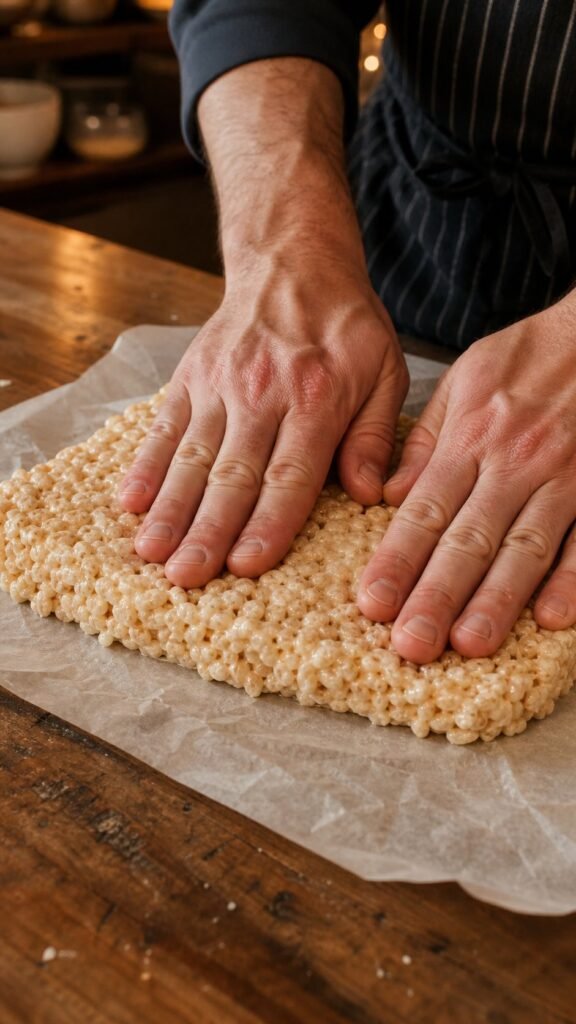
Dump about half of the sticky cereal mixture onto the wax paper. Using your greased hands, aggressively press the mixture down into a flat, tight rectangle. It needs to be about half an inch thick. If it is too thick, your sushi rolls will be the size of baseballs and impossible to eat.
4. The Gummy Core.
Line up your neon gummy worms horizontally in a straight line across the bottom edge of your cereal rectangle. Place them about one inch away from the bottom edge so you have enough cereal to fold over them.
5. The Roll.
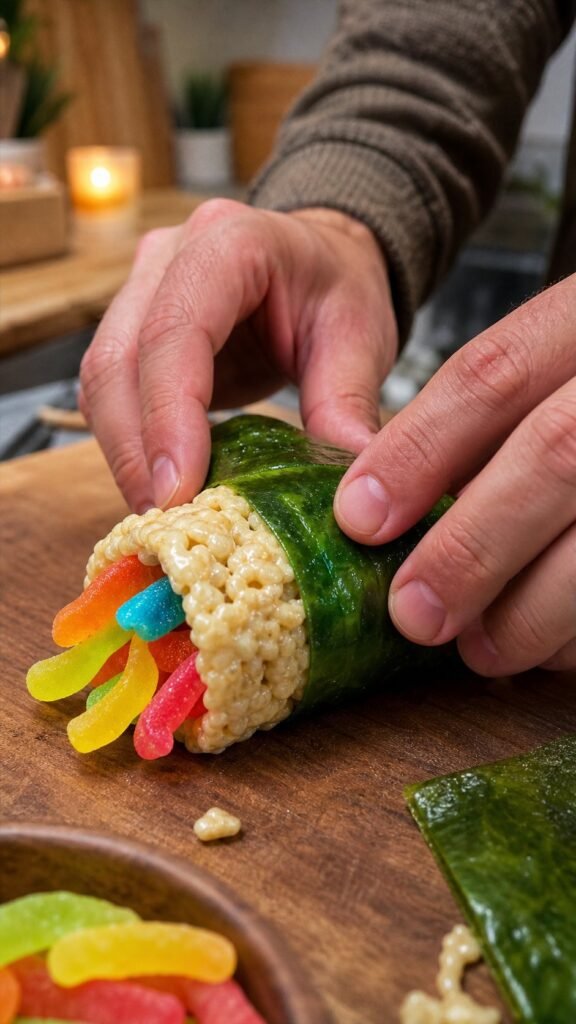
Carefully lift the bottom edge of the wax paper to help you tightly roll the cereal completely over the gummy worms. Once the gummies are encased, peel the wax paper back, and continue rolling the cylinder forward until it is a tight, compact log. Squeeze the log aggressively with your hands to make sure there are no air pockets inside.
6. The Seaweed Wrap.
Unroll two green Fruit Roll-Ups. Lay them flat on the counter side-by-side so they form a long sheet. Place your cereal log on top of the fruit leather, and roll it forward so the green candy completely wraps around the outside of the white cereal.
7. The Slice.
Do not cut it immediately. Let the massive log sit on the counter for 15 minutes to cool and firm up. Once it is room temperature, take a very sharp, serrated bread knife. Run the blade under hot water, wipe it dry, and gently saw the log into one-inch slices. Do not press straight down, or you will crush the cylinder into a flat pancake.
My Ultimate Candy Sushi Disasters
The first time I made this, I tried to speedrun the slicing process. I grabbed a heavy, dull chef’s knife and chopped aggressively straight down onto the roll while it was still warm. The heavy pressure completely squashed the round cylinder. The gummy worms violently shot out of both ends, and I was left with a flat, sticky, unidentifiable mess that looked nothing like sushi. You must wait for it to cool, and you absolutely must use a gentle sawing motion with a serrated knife.
My second mistake was trying to make the “rice” extra gooey by doubling the marshmallows but keeping the cereal ratio the same. It was entirely too wet. When I rolled it up, it had absolutely zero structural integrity. Within ten minutes, the logs completely flattened themselves out on the plate, melting into a single giant puddle of fruit leather and marshmallow. Follow the 1:1 ratio.
Frequently Asked Questions (FAQ)
Can I make these a day in advance for a kid’s birthday party?
Yes, but you must store them correctly. If you leave sliced marshmallow cereal sitting out on a platter overnight, the air will turn them stale, hard, and crunchy. Put the sliced candy sushi into a large, airtight Tupperware container with a sheet of wax paper between the layers. Keep them at room temperature. Do not put them in the refrigerator, or the gummy worms will turn into rock-hard plastic that will break your teeth.
Why won’t my Fruit Roll-Up stick to the outside of the roll?
If your cereal roll cooled completely before you wrapped it, the surface might be too dry to grab the fruit leather. Just lightly dip your finger in water and run it along the edge of the Fruit Roll-Up. The microscopic drop of water will instantly melt the sugar in the fruit leather, turning it into a powerful adhesive that locks the roll together.
Can I use actual sushi bamboo mats to roll these?
No. A bamboo sushi mat has hundreds of tiny crevices. If you put hot, sticky marshmallow cereal onto a bamboo mat, it will permanently fuse into the wood. You will never get it out, and you will have to throw your sushi mat in the trash. Only use wax paper or parchment paper.
Fun Sushi Variations (Nigiri & Sashimi)
The Swedish Fish Nigiri: You don’t have to make rolled maki! Take a small golf-ball-sized amount of the cereal mixture. Shape it into an oval block (just like a real piece of nigiri rice). Place exactly one red Swedish Fish on top of the block. Take a very thin strip of green Fruit Roll-Up (or a string of black licorice) and tie it completely around the middle of the fish and the rice block like a belt.
The Sour Belt Sashimi: Skip the rolling entirely. Press the cereal mixture flat into a square pan. Once it cools, cut the cereal into thick rectangular blocks. Take bright, multi-colored sour gummy belts, cut them to the exact size of the cereal blocks, and lay them flat on top to mimic thick, colorful slabs of raw sashimi.
The Coconut “Panko” Crunch: Right after you wrap the sushi log in the green Fruit Roll-Up, aggressively roll the entire outside of the log in a pile of toasted shredded coconut before you slice it. The coconut mimics the look of crunchy panko breadcrumbs used on deep-fried “tempura” sushi rolls, and it adds an incredible toasted flavor.
🍣 No-Bake Dessert · Fun Snacks
Cute Candy Sushi
Ingredients
The Sushi “Rice”
- 4 cups crispy rice cereal (classic Rice Krispies)
- 4 cups mini marshmallows (use fresh ones, not the stale bag from last year)
- 3 tablespoons unsalted butter
The “Nori” Seaweed Wrapper
- 1 box green Fruit Roll-Ups or Fruit by the Foot (if you can’t find green, dark purple or blue works too)
The Sushi Filling & Toppings
- 1 bag gummy worms (the bright neon ones look the best inside the roll)
- 1 bag Swedish Fish (for the nigiri style)
- Black licorice strings (optional, to tie the nigiri)
The Marshmallow Warning: Use a fresh bag of mini marshmallows. Stale marshmallows do not melt smoothly — they turn into a massive, tough, unchewable rubber ball when heated. Spend the two dollars on a new bag.
Kitchen Tools
- Microwave-safe glass bowl
- Silicone spatula
- Wax paper or parchment paper
- Serrated bread knife
- Measuring cups
- Cutting board
- Airtight storage container
As an Amazon Associate, Cook With Us Daily earns from qualifying purchases.
Directions
- Melt the glue. In a large microwave-safe glass bowl, combine the 3 tablespoons of butter and 4 cups of mini marshmallows. Microwave on high for exactly 60 seconds — the marshmallows will puff up massively. Stir immediately with a silicone spatula until completely smooth. Keep the cereal-to-marshmallow ratio 1:1; extra marshmallow makes a soggy log with zero structural integrity.
- Fold the rice. Instantly dump in the 4 cups of crispy rice cereal and fold aggressively — the marshmallow stiffens fast as it cools. Coat every single piece of cereal in the sticky white glue.
- The greased press. Lay a large sheet of wax paper or parchment paper flat on the counter (never a bamboo sushi mat — hot marshmallow fuses into the wood forever). Rub a heavy coat of softened butter all over both hands first — melted marshmallow sticks to dry skin like napalm. Dump about half of the mixture onto the paper and press it into a tight rectangle about ½ inch thick; any thicker and the rolls end up the size of baseballs.
- The gummy core. Line up the neon gummy worms horizontally in a straight line across the bottom edge of the rectangle, about 1 inch away from the edge so there is enough cereal to fold over them.
- The roll. Lift the bottom edge of the wax paper and tightly roll the cereal completely over the gummy worms. Once they are encased, peel the paper back and keep rolling forward into a tight, compact log. Squeeze the log aggressively so there are no air pockets inside.
- The seaweed wrap. Unroll two green Fruit Roll-Ups and lay them flat side by side to form one long sheet. Set the cereal log on top and roll it forward so the green candy completely wraps around the outside. If the fruit leather won’t stick, dab a fingertip of water along the edge — it melts the sugar into instant adhesive.
- The slice. Do not cut it immediately. Let the log sit on the counter for 15 minutes to cool and firm up. With a very sharp serrated bread knife — run the blade under hot water and wipe it dry — gently saw the log into 1-inch slices. Do not press straight down or the cylinder crushes flat and the gummies shoot out the ends.
Nutrition
Estimated values per piece (1 of 24):
| Nutrient | Per Serving |
|---|---|
| Calories | 110 kcal |
| Protein | 0 g |
| Carbohydrates | 22 g |
| Dietary Fiber | 0 g |
| Total Sugars | 14 g |
| Fat | 2 g |
| Saturated Fat | 1 g |
| Sodium | 55 mg |